- Call Us
- +8618633052223
- njhdvlz@163.com
Nov . 26, 2024 09:15 Back to list
lug style butterfly valve installation factories
Installation of Lug Style Butterfly Valves A Comprehensive Guide for Factories
In modern industrial applications, valves play a crucial role in managing the flow of fluids and gases. Among the various types of valves, the lug style butterfly valve stands out due to its robust design and versatility. This article provides a comprehensive guide on the installation of lug style butterfly valves in factory settings, ensuring optimal performance and longevity.
Understanding Lug Style Butterfly Valves
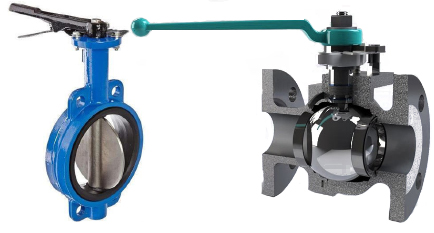
Lug style butterfly valves feature a disc that rotates on a shaft, allowing for the precise regulation of fluid flow. The lug design includes threaded inserts on the valve body, enabling it to be bolted directly to the pipeline without the need for additional support. This design makes them ideal for applications where maintenance and repair need to be manageable and where the valve may need to be temporarily removed from the line.
Installation Preparation
Before installation begins, it's essential to conduct a thorough inspection of the valve and the surrounding components. Check for any damage or debris on the valve faces and ensure that all connections, gaskets, and seals are in good condition. Proper preparation foreshadows a smooth installation process.
Tools and Materials Required
To install a lug style butterfly valve, gather the following tools and materials
1. Wrenches For tightening bolts. 2. Torque wrench To ensure proper torque specifications are met. 3. Sealant or gasket material If necessary, to prevent leaks. 4. Safety gear Gloves and goggles for personal protection.
Installation Steps
lug style butterfly valve installation factories

1. Pipe Preparation - Ensure that the pipe ends are clean and free from rust, oil, or debris. This step is crucial for forming a good seal and avoiding leaks once the valve is installed.
2. Aligning the Valve - Position the lug style butterfly valve between the flanges. Ensure that the valve is aligned correctly with the flow direction indicated by the arrow on the valve body.
3. Bolting the Valve - Start by inserting bolts into the lug holes on one side of the valve. Hand-tighten them initially to hold the valve in position. Then proceed to repeat the process on the opposite side. It is vital that the bolts are evenly tightened to prevent stress on the valve and ensure a secure fit.
4. Torque Specifications - Using a torque wrench, tighten the bolts to the manufacturer’s specified torque settings. This step is critical to avoid over-tightening, which can damage the valve or the pipe flanges.
5. Final Inspection - After the valve is installed and all bolts are tightened, perform a thorough inspection. Check for proper alignment, ensure that all bolts are secure, and verify that there are no visible leaks.
6. Testing - Before the system goes operational, open and close the valve to make sure it functions correctly. Monitor for any leaks during this test to be confident that the installation was successful.
Maintenance Tips
Once installed, it’s essential to maintain the lug style butterfly valve to ensure enduring reliability. Regularly inspect the valve for signs of wear or leaks, and clean the valve as needed to prevent buildup. Following the manufacturer's guidelines for maintenance will significantly extend the lifespan of the valve.
Conclusion
The installation of lug style butterfly valves in factory settings requires careful planning, precise execution, and ongoing maintenance. By following the guidelines outlined in this article, factory personnel can ensure that their valve installations are successful, efficient, and safe. Understanding the nuances of installing and maintaining these valves can lead to improved operational efficiency and reduced downtime, ultimately benefiting the overall production process. Proper installation not only enhances functionality but also contributes to the longevity of the system, reaffirming the importance of diligent valve management in industrial environments.
-
Double Flanged Short Pattern Butterfly Valve | Compact, Efficient Flow
NewsAug.01,2025
-
Precise 3-Inch Butterfly Valve Dimensions | Durable Flow
NewsJul.31,2025
-
3 Butterfly Valve Dimensions | GPT-4 Turbo Precision Specs
NewsJul.31,2025
-
Stainless Steel Sanitary Butterfly Valve for Hygienic Flow Control
NewsJul.30,2025
-
High-Performance Groove Butterfly Valve for Easy Installation
NewsJul.30,2025
-
High-Quality 2 Inch Butterfly Valve for Precise Flow Control
NewsJul.29,2025